# Contribution Billing
# Pre-Requisite
Before preparing the contribution bill for any month, confirm that the following have been don:
New Members have been Uploaded and Process the member Contribution age bands
Movements for the previous month have been processed (Exits and Transfers)
Cash Supp configs for new members have been done and confirm for the members who have made new selections for their rates
Upload the Member salaries for the month
# Billing process for the month
Step 1: Navigate to the contribution billing window
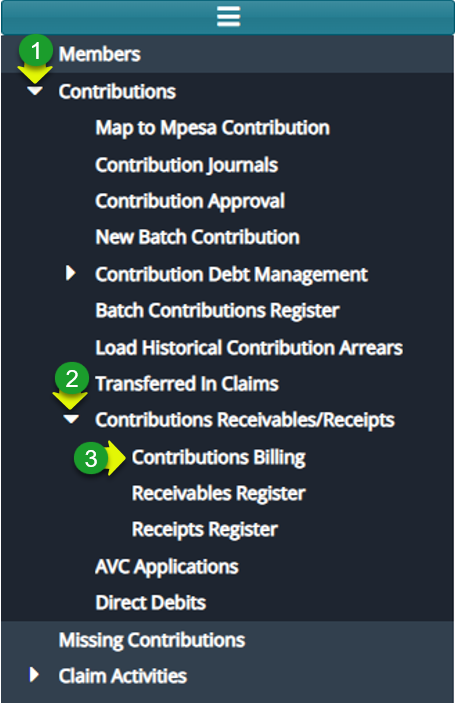
Actions
Click on the "Contributions" menu to load a drop-down menu
Click on the "Contribution Receivables/Receipts" menu
Click "Contribution Billing"
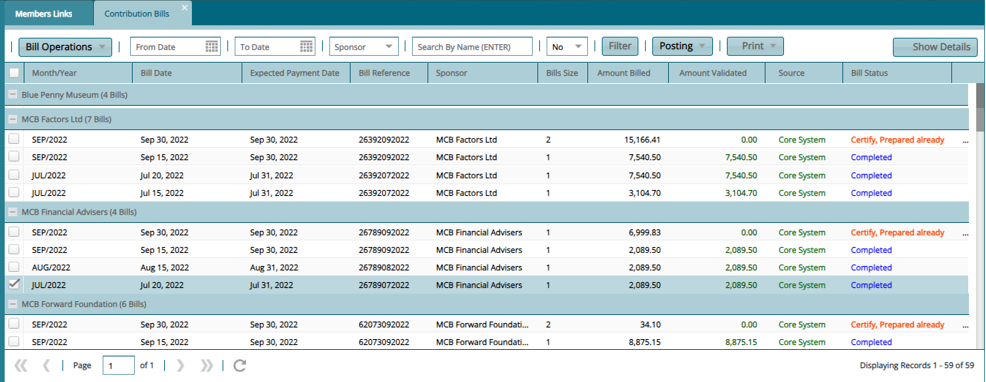
Step 2: See all generated bills categorized by employer
Step 3: Navigate to the new bill details form
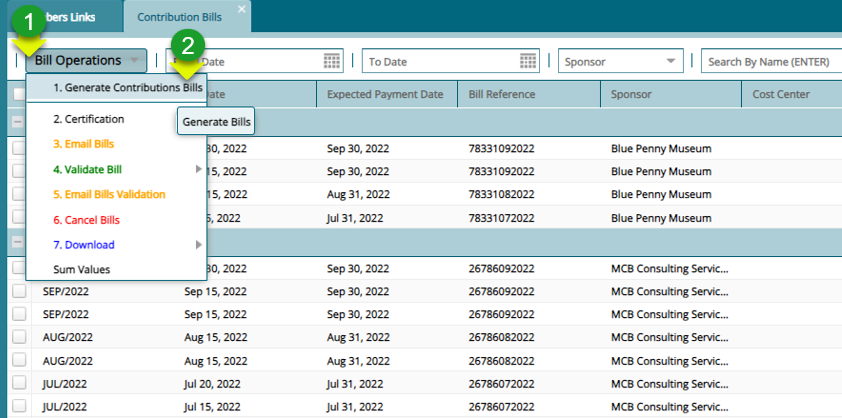
Actions
Click on "Bill Operations" to load a drop-down menu
Click "Generate Contribution Bills" to open the billing details form
Step 4: Process a new bill
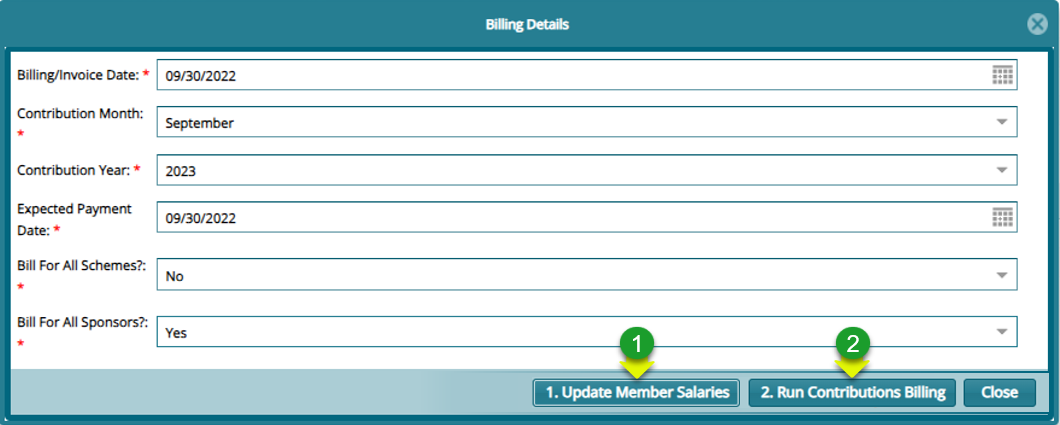
Actions
Click on "Update Member Salaries" for the process to use the latest salaries that have been uploaded
Click on "Run Contributions Billing"
Note: Specify if the bill generation is for all the schemes (Bills for all Schemes?) and if the bill is for all sponsors (Bill for all Sponsors? If NO select the Sponsor that you wish to generate the bill for)
In case of any exceptions, the process will fail, and the exceptions will be listed in the window as shown below:
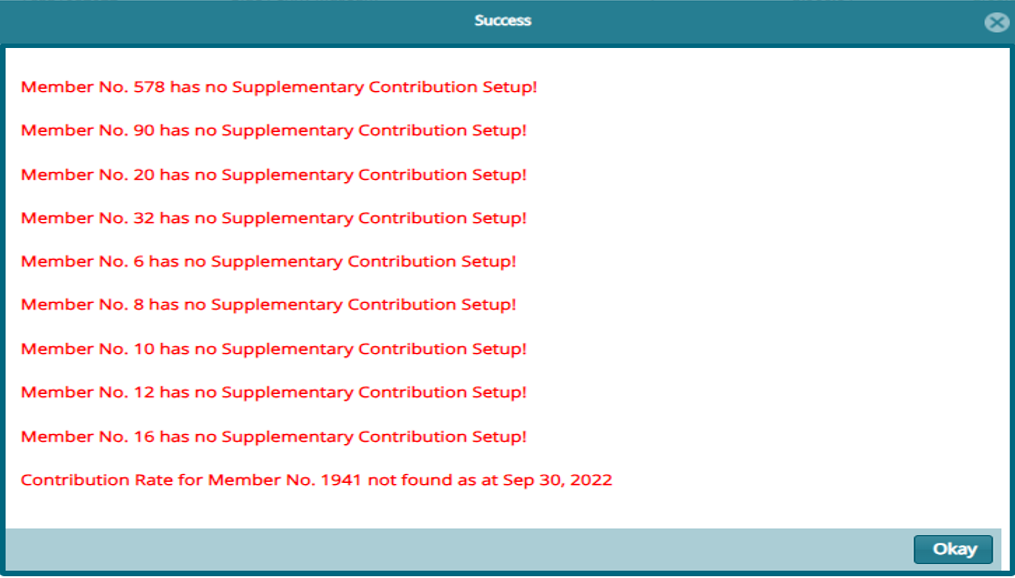
Note: Correct the listed Exceptions accordingly and rerun until the process is successful for the given month.
Step 5: Authorize the newly created contribution bill

Action
Click to select a batch file from the list
Click "Bill Operations" menu to open drop-down menu
Click "Certification" from the drop-down menu
Click "Certify and Approve" respectively to authorize the bill
Step 6: Validate the authorized bill
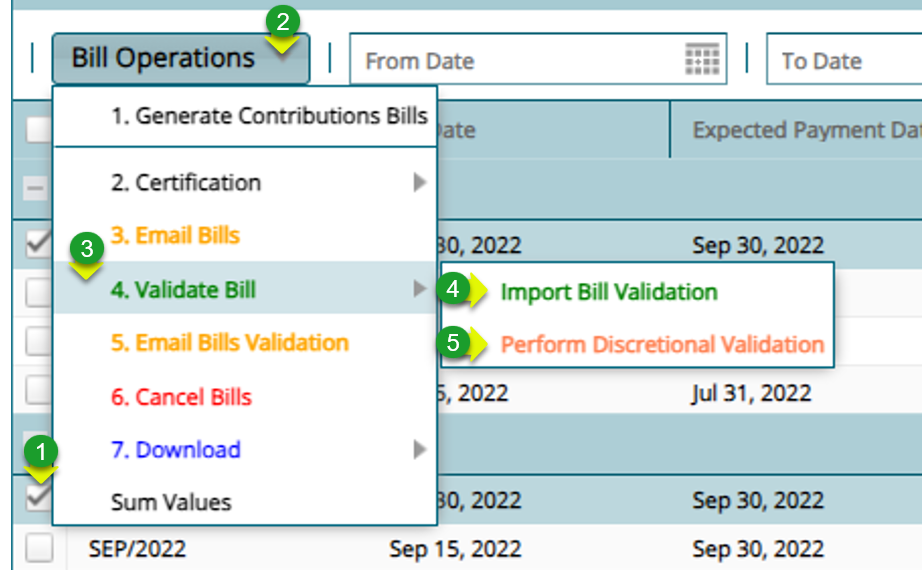
Action
Click to select a batch file from the list
Click "Bill Operations" menu to open drop-down menu
Click "Validate Bill" from the drop-down menu
Click "Import Bill Validation"
Click "Perform Discretional Validation"
Step 7: Download Contribution Bills
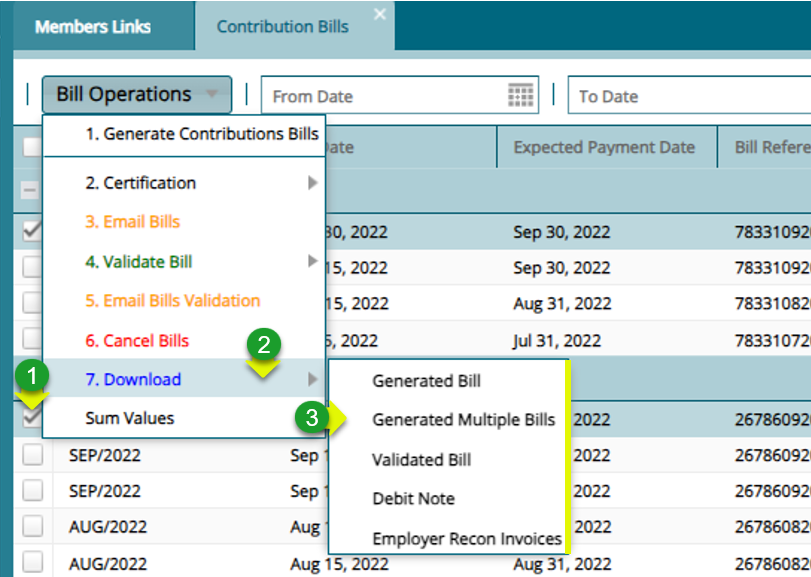
Action
Click to select a contribution bill record from the list
Click "Download" menu to open drop-down menu
Click "Generated Bill" or other options from the drop-down menu
Step 8: Convert the Bill to Contribution Batches
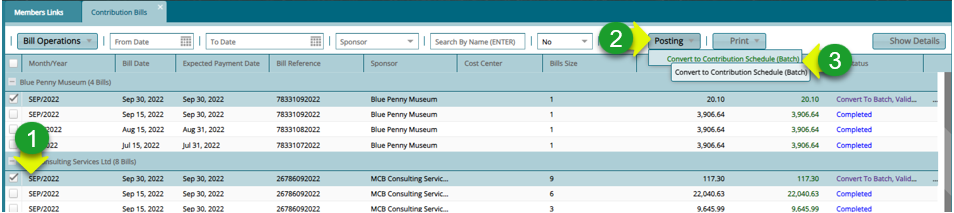
Action
Click to select a contribution bill record from the list
Click "Posting" menu to open drop-down menu
Click "Convert Contribution Schedule to Batch" from the drop-down menu
Step 9: Navigate to Previous Batches

Action
- Click on the "Previous Batches" hotlink on the Members link window
Note: Clicking the "Previous Batches" link will open the Batch Contributions Register
Step 10: Confirm Batch exception before posting to members
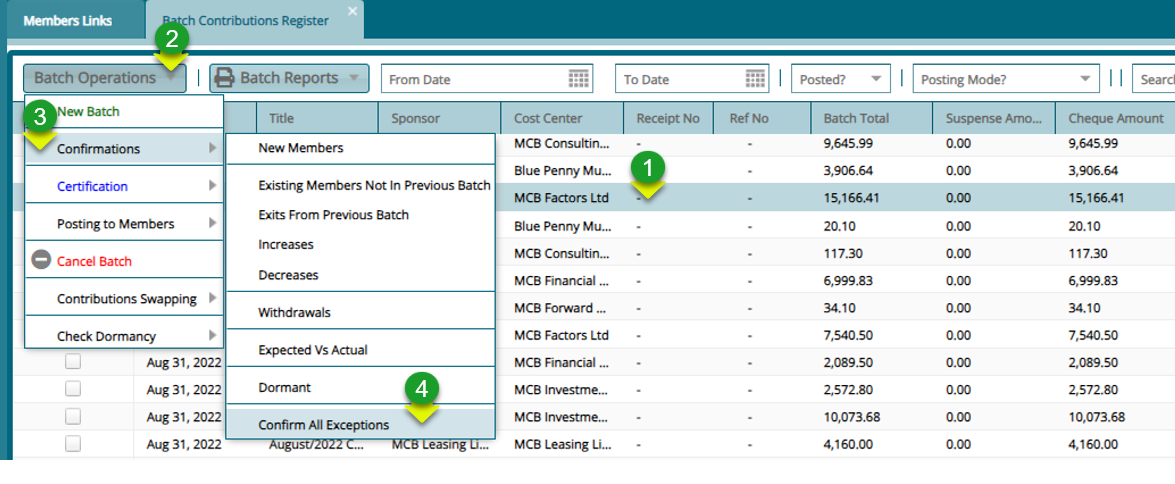
Action
Click to select a contribution batch record from the list
Click "Batch Operation" menu to open drop-down menu
Click "Confirmations" from to open a drop-down menu
Click "Confirm All Exceptions"
Step 11: Authorize batch before posting
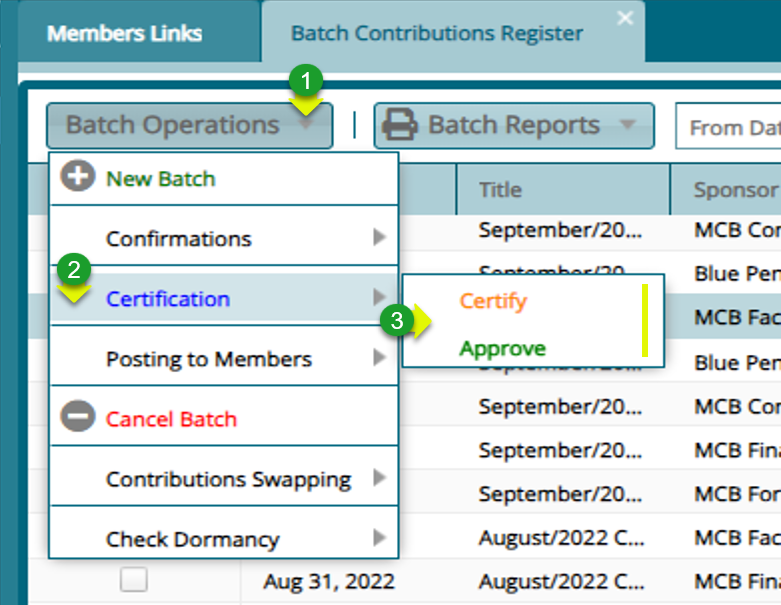
Action
Click "Batch Operation" menu to open drop-down menu
Click "Certifications" from to open a drop-down menu
Click "Certify and Approve" Respectively
Step 12: Post the Contributions to Member Accounts

Action
Click to select a contribution batch record from the list
Click "Batch Operation" menu to open drop-down menu
Click "Posting to Members" from to open a drop-down menu
Click "Post Contributions" to post contributions to individual member accounts